Culinary Chemistry – The Essential Guide
Introduction to Culinary Chemistry
Today we are going to get into the amazing world where cooking and chemistry come together! Every slice, dice, and stir is part of a science experiment in your kitchen. Cooking? It’s where creativity meets chemistry, and the results are pure magic on your plate. Understanding the “why” and “how” behind pot and pan reactions turns good dishes amazing. Today, we explore the chemistry of everyday kitchen wonders. Ever wonder why chopping onions leads to tears? Or how heat gives basic meat a burst of flavor? And the secret to that clingy, perfectly emulsified vinaigrette? It’s all science. So, grab your apron, and let’s demystify food reactions. Get ready to unlock the secrets behind your foodᅳit’s like a tasty puzzle waiting to be solved. And the best part? You get to eat your discoveries!
The Science in Every Slice and Stir
Cooking is about knowing how each ingredient reacts—whether it’s heat, acid, or time—that’s where flavor, texture, and complexity come alive. Acidity cuts through sweetness, balancing flavors, while heat triggers Maillard reactions and caramelization, transforming proteins and sugars into deeper, richer tastes.Your stove applies controlled heat, initiating Maillard reactions that deepen flavors, while a whisk ensures emulsions and aeration in sauces and dressings.
Turning the Kitchen into a Lab
Cooking isn’t about mixing stuff in a pot and hoping for the best. It feels like you’re walking into a lab, all curious and ready to cook up a storm. You’re the one in charge, both discovering and creating all at once. By the end of this adventure, you’ll sit down to some seriously tasty eats and get why those flavors pop like they do. Let’s fire up the stove and get prepped—because the science behind every step is what takes your dishes to the next level. Grasping how heat denatures proteins or keeps emulsions stable lets you intensify flavor complexity, achieve velvety textures, and master balance in every bite. Each step of the process becomes not only hands-on but deeply rewarding.
Why Onions Make Us Cry
First, we’re cutting into why onions are such tearjerkers. It turns out, when we chop onions, we’re actually setting off a tiny chemical explosion. These veggies release a gas that, when it hits our eyes, creates that familiar stinging sensation. But don’t worry, I’ve got some chef-inspired techniques to keep those tears at bay.
Our best friend – the Maillard Reaction
Next, we’ll kickstart the Maillard reactionᅳthat golden crust and deep flavor you get when heat meets proteins. It’s what turns good dishes into unforgettable ones. This is where the real flavor happens in cooking. It’s not just cooking; it’s a flavor transformation. This reaction makes a simple piece of meat incredibly savory, all thanks to a little heat. We’ll break down the science behind achieving that ideal searᅳhow heat, moisture, and timing create a golden-brown crust that’s packed with flavor. Nail this technique, and watch your dishes turn into something unforgettableᅳflavors pop, textures melt, and the look? Total pro-level, right from your own kitchen.
The Art of Emulsification
Don’t forget about emulsification—it’s the secret to creating smooth, creamy sauces that hold together perfectly, every time. Mixing oil and vinegar feels like mixing opposites, but do it right, and they balance perfectly. That’s how you take your vinaigrette from okay to incredible. Let me teach you to make a dressing so tasty, your salad will want extra.
Expanding the Universe of Culinary Science
Once you’ve got the hang of slicing those onions and getting that perfect sear, the kitchen changes—it’s no longer just a room; it’s where flavors meet and blend in ways that surprise you. Let’s talk about getting that perfect rise in your bread, finding the crunchiest coating for your fried snacks, and figuring out how to preserve all that goodness through pickling and fermentation. We’ve barely started to explore all the ways science shakes things up in the kitchen—there’s so much more waiting to be discovered. As we go further, the simplest ingredients open up layers of flavor you didn’t expect—each dish surprising you with new textures and hidden depth.Arm yourself with a spatula and ignite your curiosity, for our culinary quest is about to take off! Here, we’re not just mindlessly following recipes—we’re diving into the why and how that make them exceptional. As we play with new ingredients and flavors, you’ll start to see how food science turns a dish into something extraordinary—where textures surprise you, and each bite shows off a technique you never even thought of.
The Journey of Culinary Exploration
Each time we step into the kitchen, we are going to start to see the familiar with fresh eyes. A little technique paired with curiosity, and before you know it, a simple ingredient transforms, adding layers of unexpected flavor. Cooking goes beyond just following steps. Sometimes it’s about figuring things out mid-recipe. Or maybe figure something unexpected out that makes all the difference. It’s those small surprises that happen and suddenly, the dish is better than you thought possible. Let’s turn our kitchens into the most fun labs around, where every dish is an exploration and each bite blows us away.
Why Onions Make Us Cry
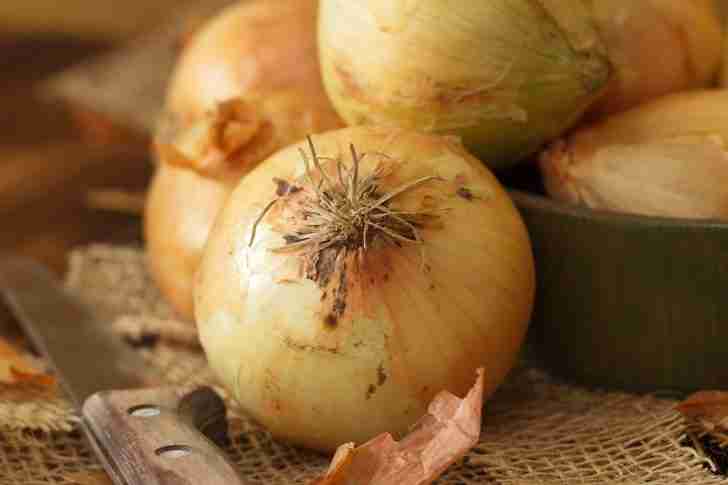
Let’s spend some time in the world of onions! Ever wonder why onions bring tears to the kitchen? It’s their natural defense—releasing compounds that not only fend off pests but have us blinking through the tears.When we chop an onion, we trigger a chemical reaction by breaking its cells. That’s when syn-propanethial-S-oxide kicks in, causing the tears to flow.Once this compound comes into contact with the moisture in our eyes, it transforms into sulfuric acid. That’s what leads to the familiar stinging sensation.
Combating Tears: Practical Tips for Onion Chopping
But this shouldn’t stop you from adding onions to your dishes. To cut down on the tears, try a couple of tips. Cooling your onions in the fridge before cutting can lessen the chemical reaction, so less of that tear-triggering compound gets out. One of the most important times for this – make sure your knife is nice and sharp! A dull knife breaks more onion cells, releasing more of the irritant. Keeping your onions cold and your knives sharp means you can chop with less crying.
Advanced Techniques to Keep the Tears at Bay
Another handy tip is to cut the onion near an open flame, like your stovetop burner. Some chefs swear by the flame’s ability to pull away those irritating onion compounds, while others opt for modern tricks like onion goggles to keep their eyes tear-free. Believe it or not, they’re real and a big help for anyone easily teary from onions.
Cutting Techniques for Fewer Tears
Talking about technique, the way you slice an onion also affects how much it hurts our eyes. Begin by cutting off the onion’s top and peeling away the outer layer, but keep the root end in place. The root contains a higher concentration of the compounds, so cutting it last minimizes exposure. This trick takes the sting out of chopping onions—your knife glides through with ease, and the tears? Not nearly as bad right?
The Last Resort for Onion-induced Tears
If you’re still tearing up, don’t worry—onion goggles (that’s a thing, no joke) or a quick trick like breathing through your mouth can help. Stick out your tongue while chopping to guide the irritants away from your eyes. It might feel a bit silly, but it works because it redirects the compounds, reducing their contact with your eyes.
Embracing Onions in Cooking Without the Tears
With these tips in hand, onions will no longer be the tearjerkers of your kitchen. Forget “just another ingredient”ᅳthese subtle ingredients work quietly in the background, adding richness and depth without stealing the spotlight. They will do what they are supposed to do, contribute depth and savoriness without the waterworks. You’ve got this! Next time you grab your knife, slice through your onions without hesitation—they don’t stand a chance! May The Force Be With You – Sorry, I just can not help myself with an opportunity for a Star Wars quote. Yep, I’m a total nerd!! - With these tips in hand, onions will no longer be the tearjerkers of your kitchen, thanks to the principles of culinary chemistry! Cool huh?
The Maillard Reaction: Flavor’s Best Friend
Introduction to the Maillard Reaction
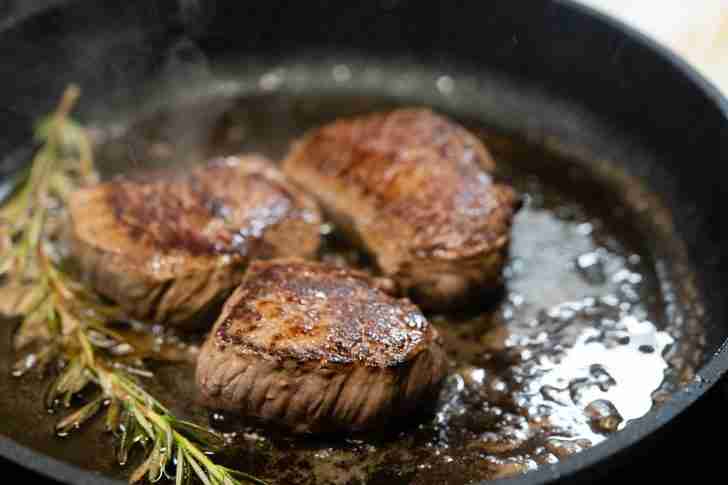
Have you ever eagerly watched a steak on the grill as its surface turns into a golden, crispy crust? Or savored the aroma of bread as it reaches the perfect level of toastiness? Friends, meet the one of my favorites rooted in culinary chemistry: the Maillard Reaction. The Maillard reaction adds layers of flavor and richness to your cookingᅳthink golden-brown crusts, nutty aromas, and that irresistible sear on your steak.It’s what gives your steak that perfect crispy crust or infuses roasted veggies with nutty, savory richnessᅳturning a good dish into something you can’t stop eating. The Maillard reaction happens when high heat meets proteins and sugars, creating a beautifully browned crust. You can hear the sizzle, see the golden edges form, and taste how the layers of flavor build up with each passing second. It changes your food’s flavor from just okay to unforgettable. Getting to know and use the Maillard Reaction lets you tap into a whole new level of flavor in your dishes
The Science Behind the Flavors
The Maillard Reaction browns the surface of your food, turning proteins and sugars into a crispy, golden crust and unlocking rich, savory flavors. When proteins and sugars hit the heat, the crust develops its signature crunch, filling the kitchen with rich, savory notes that hint at that drool inducing flavor! Each bite begins with a crisp, satisfying crunch, but it’s the deep, caramelized flavors from the Maillard reaction underneath that add a rich, savory complexity
How the Maillard Reaction Works
The Maillard Reaction is where the serious flavoring happens in cooking. As heat rises, amino acids and sugars in your food break down and combine, creating a beautiful golden crust and deep, savory flavor. This is the kind of moment that sneaks up on youᅳheat cranking up, searing that steak into a crust that’s almost… too perfect, if you ask me. The flavors hit your nose, and suddenly, it’s not even about the steak anymore. The vegetables? Crisping up like they have their own agenda. And thenᅳjust like thatᅳthe texture shifts, proteins and sugars doing their thing, but you feel it, more than see it. Keep an eye on the color and smell as the food browns; that’s the Maillard Reaction working to build those rich, mouthwatering layers of flavor! It starts at certain temperatures, often between 280°F and 330°F (140°C and 165°C). The Maillard Reaction triggers really interesting change in your food. It’s more than simple browningᅳit creates a cascade of intricate chemical reactions, generating a multitude of deep, savory flavors. This is why a perfectly grilled steak, thanks to culinary chemistry, tastes vastly better than a boiled one.
The Importance of Temperature and Dryness
Heat meets amino acids and sugars, triggering a reaction. This is where things really start to come together—flavors deepen, and the aromas? They’re just hitting that sweet spot, filling the kitchen with something indescribable. It’s funny how temperature can make or break everything—get it just right, and you’ll see flavors come alive in ways you didn’t expect. If it’s too low, the Maillard Reaction fails to initiate; if too high, there’s a risk of burning the food. Nailing this transformation? It’s all about finding that sweet spot, balancing just enough without tipping over— you’ll know when you’ve hit it. It depends on dry heat and the precise mix of food chemistry elements.
Achieving the Perfect Maillard Reaction
Getting that perfect temperature down is just the beginningᅳkeeping it steady? Here’s where things get messy. Hang in there, because once you’re deep in, things have a way of unraveling faster than you’d thinkᅳnothing stays simple for long, does it? And you know what? Its those easy steps – they have a way of turning sideways. If the heat’s all over the place, your food cooks unevenly, throwing off that beautiful Maillard Reaction. Getting the temperature just right is only half the battleᅳkeeping it steady? That’s when things get a little dicey, you’ll feel it when it happens. Moisture is the enemy when you’re aiming for those perfect, flavor-packed reactions. A dry heat brings out the best in your ingredients. Dry, we love dry!
The Impact of the Maillard Reaction on Cooking
The unique taste of a seared steak, compared to boiled, comes from the Maillard Reaction. While both start with beef, searing triggers this reaction, enhancing the steak with rich and complex flavors. This happens because high heat facilitates a chemical interaction between amino acids and sugars (remember chemistry class here – and I did say I was a nerd before right? :), resulting in that appealing crust. In contrast, boiling doesn’t achieve the temperatures required for this reaction, yielding a less pronounced flavor. It’s really all about how you heat it—get that right, and those hidden flavors don’t just show up, they leap out at you!
Taking Your Cooking to the Next Level
Getting the Maillard Reaction right can take your cooking from okay to wow. It’s all about playing with heat and timing to get that delicious crust on your steak or that just-right golden brown on your bread. It’s the kind of thing that takes everyday cooking and turns it into something you didn’t even realize you were missingᅳuntil now. It’s really not just some fancy talk (although if you start describing some Star Wars tech in detail, go fancy!!! )ᅳit makes a real difference when you’re cooking. With just a little know how, you’ll find flavors that’ve been right there the whole time – how dare they hide from you! You’ll be turning everyday meals into something crazy good.
Mastering Culinary Chemistry Through the Maillard Reaction
Mastering the Maillard Reaction is one of those kitchen skills that can totally change your cooking gameᅳand the best part? It’s completely doable, even if you’re just getting started! Once you’ve got this nailed, you’ll be serving up steaks with that perfect golden crust you’d expect from a steakhouse, baking bread that’s crisp on the outside, soft in the middle, and brewing coffee so rich, I promise you won’t want to go back to your usual brew. It’s more than just cookingᅳit’s where creativity in the kitchen really starts to take off. What’s cool is that this knowledge fuels everything from flavor experiments to totally new dishes. And suddenly, your usual routine? It turns into a whole new world of flavors and textures you didn’t even know were there. Pretty exciting, right?
And if that was not enough, check out this really interesting article from the Academy of Applied Pharmaceutical Sciences: Maillard Reaction
Maillard in Action
The Sizzle and Crunch: Meats, Breads and Coffee
- Browning Meat: Hear that burger sizzle on the grill? That’s not just a great sound; it’s the Maillard Reaction forming a savory crust you can’t ignore. This process turns simple meat into a delicious treat!
- Toasting Bread: Ever see bread turn from soft to golden and crunchy? That Maillard Reaction? That golden color? It’s all thanks to the Maillard Reaction – looks AND taste? Yes, please!! This is my absolute favorite person to learn how to make bread: Joshua Weissman Sourdough Bread
- Roasting Coffee: Roasting Coffee: Ever seen coffee beans shift from grassy green to that rich, deep brown? That’s the Maillard Reaction working its unique talent, filling your cup with flavor you can smell before you even take a sip.
From the Pan to the Oven: Seafood and Vegetables
- Pan-Seared Fish: When a fish fillet hits the hot pan, things get exciting. That golden crisp on the fillet? It’s not just for looks—it pulls out all those rich, natural flavors, leaving the whole thing even more irresistible.
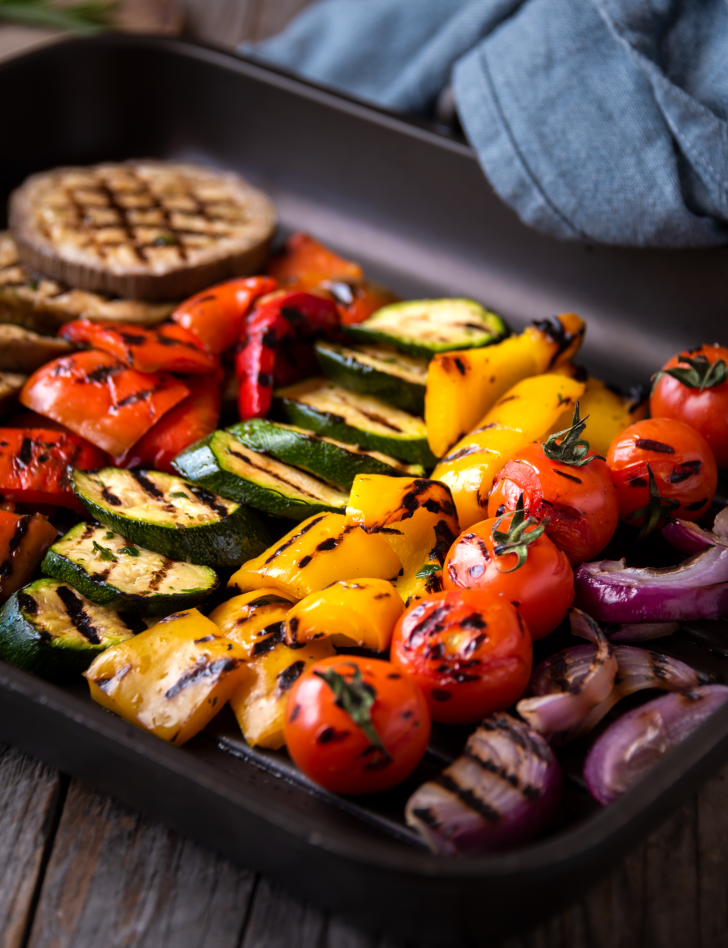
- Roasted Vegetables: Ever wondered why roasted veggies taste sweeter and get that slight crunch? It’s the Maillard Reaction caramelizing them in the oven.
- Grilled Cheese Sandwich: The perfectly browned and crispy exterior of the bread, paired with melted cheese, yes? That’s the Maillard Reaction adding depth to a simple dish.
Sweet and Savory Delights: Onions and Nuts
- Caramelizing Onions: Slow cooking onions transforms them into a deeply golden and sweet treat. Ever wonder how a simple sear can create so much flavor? That’s the Maillard Reactionᅳtaking sugars and turning them into those deep, savory bites
- Roasting Nuts: Roasting almonds, pecans, or peanuts deepens their taste, making these nuts snacks you’ll keep reaching for.
- Fried Rice: The slightly crispy, golden bits of rice that elevate fried rice? That’s the Maillard Reaction adding texture and taste.
Baked and Sautéed: Pretzels and Mushrooms
Baked Pretzels: That deep brown, crackly crust? It’s more than just looks. The Maillard Reaction locks in those rich flavors, perfectly? Should we say perfectly? Yes! Pretzels ARE perfect! !
Sautéed Mushrooms: Browning mushrooms in a hot pan isn’t just about changing their color. This process amplifies their umami flavor, all from our friend the Maillard Reaction at work!
Golden Favorites: Fries and Scallops
- French Fries: Ever wonder why fries are so hard to resist? When those potato slices hit the oil and get all crispy and golden, it’s the Maillard Reaction in action, sealing in that crave-worthy flavor you love. Ok, who does not love French Fries?
- Seared Scallops: Seared scallops offer a perfect example of the Maillard Reaction. By searing them you get a beautifully caramelized outside, and you’re adding a deliciously sweet and nutty edge that’s a great complement to their tender inside.
Maximizing the Maillard Reaction
Craving that deep, crispy goodness in your dishes? Nailing the Maillard Reaction is the trick. Wanna know how the pros do it? Let’s break it down.
Getting Ready for the Maillard Reaction
- Dry the Surface: Moisture’s not doing you any favors when it comes to Maillard. Make sure to pat your food dry before it meets the heat. It’s what gives that outer crust its irresistible crunch, sealing in all the juicy goodness underneath. Now that’s how you sear!
- Heat Up Your Pan: Get the Maillard Reaction going with a pan that’s already hot. This way, your food sears perfectly without overcooking and drying out.
- Don’t Crowd the Pan: Keep it spacious. Overloading the pan drops its temperature, leading to steaming rather than browning. Laying them out separately ensures everything cooks evenly and gets that perfect golden touch.
Optimizing Cooking Conditions
- Select the Proper Oil: High smoke point oils like avocado, canola, or grapeseed are your best bet. These hold up to high heat like a champ, letting you get that beautiful crust without any of the burn.
- Turn up the heatᅳnot just preheating, but cranking it high when cooking makes all the difference. That’s where our buddy, the Maillard Reaction lives. This technique gives your food that perfect, golden finishᅳcrispy on the outside, tender underneath.
- Give It Time to Rest: After cooking, let meats sit for a bit before cutting into them. This step, while not related to the Maillard Reaction, allows the juices to spread evenly, making each bite wonderfully juicy.
Enhancing Flavor and Texture
- Don’t Fuss with It: Once your food hits the pan, let it be. Moving it around too much can mess with the cooking process. Allowing it to cook without interference helps form a nice, even crust. A little patience here really enhances the taste.
- Salt is great for boosting flavor: Sprinkle some on your food right before it hits the pan. This draws out moisture, crisps things up, and layers in bold flavor—giving you that irresistible golden crust every time. But remember, go easy with it to avoid drying out your food.
- Slightly Increase Thickness: Thicker cuts of meat or larger pieces of vegetables ensure the inside stays moist and tender while the outside gets that perfect Maillard crispness. Thin slices can overcook before achieving the desired browning.
Final Adjustments for Flavor and Crispness
- Marinate with Acids: Toss a splash of vinegar or squeeze some lemon into your marinade. It does a bit more than just add zest. Give your meat a quick sear and watch it turn that perfect golden-brownᅳoh, and the flavor? It locks in all those savory juices you won’t forget anytime soon.
- Control the Sugar: Foods with natural sugars or those marinated in sweet sauces caramelize and brown quicker. Keep an eye on the clockᅳthose sugary glazes can turn on you fast! Adjust the cooking times so you get that perfect caramelization without burning.
- Cast Iron or Stainless Steel: The type of pan matters. Go for cast iron or stainless steel pans when you’re aiming for that perfect browning. They hold onto heat amazingly well, ensuring your food gets a nice, even color all over.
- Finish in the Oven: For thick cuts of meat, start with a sear on the stove and then move to a preheated oven. This method allows the Maillard Reaction to create a flavorful crust while the inside cooks to perfection without burning the outside.
Over at Serious Eats – Honestly, I am such a fanboy of these guys. They have sooo much information – a great place to learn. Here is even more info about the Maillard Reaction
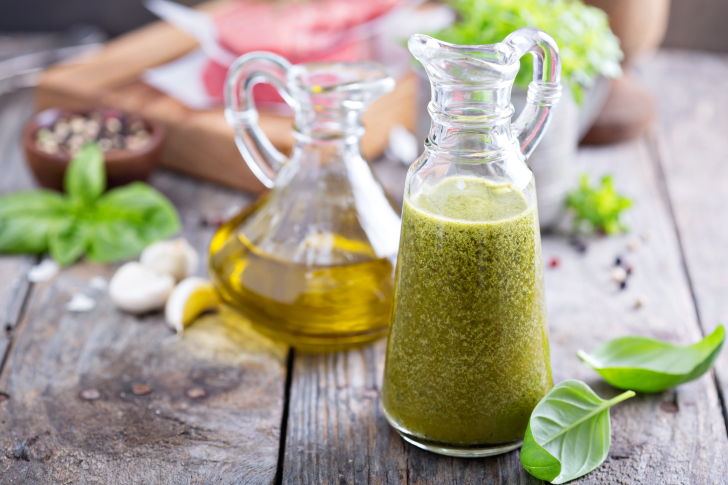
Emulsification Explained
Understanding Emulsification in the Kitchen
Emulsification is one of those kitchen tricks that you really need to master. Luckily, it’s easy peasy! Oil and vinegar? They don’t usually get along. But with just a quick whisk, they come together perfectly, almost like magic. You can practically feel the satisfaction settle in. It’s so darn satisfying when you get it just right, and the whole dish transforms.
And once you’ve got this down, your sauces and dressings will never be the same. Seriously, you’ll find yourself wondering how you ever made a salad without a perfectly emulsified vinaigrette. You’ll start experimenting, too—different oils, maybe a splash of lemon or a dab of mustard—and suddenly, you’re creating dressings that make everything taste way better. So, yeah, mastering emulsification? Don’t leave home without it! (Any Gen X’ers out there?)
The Science of Emulsification
Emulsification is really just about how the ingredients come together on a molecular level. On that note, my Dad was a professor of Physics an Chemistry. I inherited the love of science from him. If you want to go really deep – super deep about emulsification, I love reading this stuff: Emulsification from ScienceDirect. It’s all about how a little scienceᅳand just a quick whiskᅳcan get oil and vinegar to play nice. It’s that moment where, after just a few stirs, you can already tellᅳyep, this is going to be great. You can see the sauce starting to come together, and everything just feels right. Emulsifiers like mustard or egg yolk have special molecules. One part attracts water (hydrophilic) and the other loves oil (hydrophobic). It’s this little trick that makes them perfect for getting oil and vinegar to finally work together, creating that smooth, velvety texture that’s just so satisfying to see come together. As a result, the dressing not only looks uniform but also delivers consistent flavor and texture in every bite. This interaction at the molecular level is what turns a simple salad dressing into an experience, making emulsification a cornerstone of culinary skill.
The Impact of Emulsification on Flavor and Texture
Getting emulsification right isn’t just about how your dish looks or feels—it also changes the way the flavors come together, making every bite that much better. It changes the way flavors hit your palate, blending them so they work together, instead of standing all by themselves – poor things! When oil and vinegar spread evenly throughout the dressing, it makes every little bit taste balanced. Such balance is key to making sure the dressing complements, not overwhelms, the salad’s natural flavors. And… emulsification’s stability keeps the dressing mixed well. It stops the ingredients from separating and sinking to the bottom. This consistent quality, whether you dress a salad now or later, pinpoints the value of emulsification. It is this interaction at the molecular level, a key aspect of culinary chemistry, that turns a simple salad dressing into exactly what it should be.
Emulsification Beyond Dressings and Sauces
Emulsification plays a much bigger role than just in your dressings and saucesᅳit’s the secret behind creating smooth textures and balanced flavors in all kinds of dishes. And it just seems to pop up everywhereᅳwhether you’re quickly tossing together a dressing or letting a sauce simmer. Funny how it’s so simple, but the results? Next level.Once you’ve got this down, you’ll catch yourself thinking, “Wait, how did I even cook without this? From silky mayonnaise dressing up your sandwich to the luxurious hollandaise sauce draping over eggs Benedict, that’s emulsification! The essence of emulsification in cooking is its blending power. And vinaigrettes are probably the easiest way to see where emulsification really proves its worth. It transforms a simple oil and vinegar mix into a richer dressing. This does more than just improve the taste of your saladᅳit creates a light, even coat on every ingredient
Culinary Chemistry Through Emulsification
Don’t think emulsification is just for dressings! This technique can make any sauce—even a simple vinaigrette or a luxurious hollandaise—seriously smooth and creamy. Consider the silky ganache on your dessert plate or the mousse’s fluffiness. It’s all about mixing—think creamy chocolate blended just right or incorporating a touch of air to make them irresistibly rich and soft. simultaneously. Similarly, in savory realms, the technique binds ingredients in meatballs and imparts creamy textures to butter sauces. These sauces, better clinging to pasta or vegetables, improve every dish they grace. The key to these amazing dishes? It’s all about getting the perfect mix of ingredients, even if they don’t seem like they’d work together at first. Think basic ingredients can’t be incredible? Emulsification is the secret to turning them into something special!
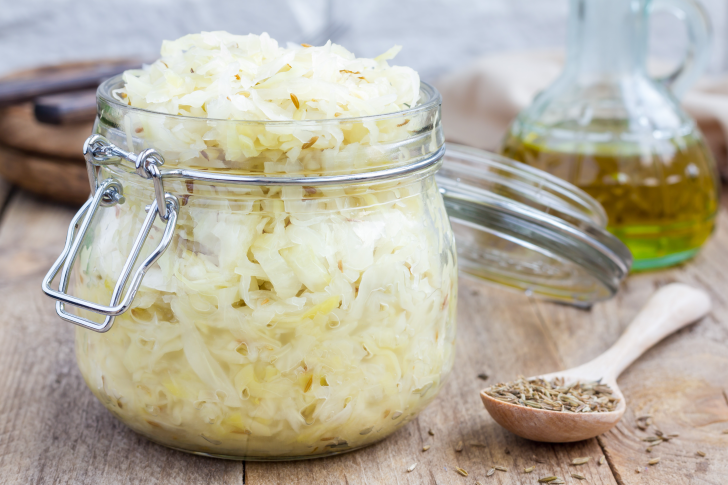
The Science of Fermentation: Flavors Unlocked
The Ancient Art of Fermentation
Fermentation? Oh yeah, it’s been around forever, and there’s a reason why it’s still going strong in kitchens today. Think fermentation is just about preserving food? Think again! Don’t underestimate the power of fermentation! Think the hulk of food – not the strength, the transformation – except nice not big, mean and green!! Those tiny microbes can transform even the simplest ingredients into something incredible – really. Cabbage to sauerkraut? How is that flavor change even possible – gamma rays? No! Think fermentation is just for the pros? Fermentation might sound intimidating, but it’s the secret to next-level flavor in everything from sourdough bread to kimchi to tangy yogurt And the best part? Go ahead, play with your food! Experimenting with Fermentation is fun, and the flavors it adds? Yum? Yes? OH YEAH!
This is an AWSOME article about Fermentation from the National Library of Medicine: Fermentation
How Fermentation Works
Fermentation is a cool trick where tiny workers like bacteria, yeasts, and molds get busy turning sugars and starches into alcohol or acids. But it’s not all about shelf life—this process also brings in a bunch of new flavors, scents, and even some health perks. Think about it: without fermentation, we wouldn’t have the zing in yogurt, the tang in sourdough bread, or the unique taste of kimchi. And let’s not forget drinks! A good glass of wine or a cold beer? Fermentation! Think those classic flavors happened overnight? Don’t be intimidated by the word ‘fermentation.’ It just means those tiny microbes are hard at work developing amazing flavors.
The Flavor and Health Benefits of Fermentation
Fermentation doesn’t just upgrade flavors—it transforms them completely! Don’t underestimate those tiny microbes! It’s those tiny microbes, quietly transforming your food through the magic of fermentation. Not only that, its incredibly healthy. Take the sharp tang of sauerkraut or the deep umami of soy sauce as examples. These distinctive flavors emerge directly from the fermentation process. During fermentation, various microbes, including bacteria and yeast, actively break down sugars and other compounds. Acids, alcohols, and esters—they might sound intimidating, but they’re the secret to those incredible, tangy flavors we love in fermented foods. In this natural and transformative process, simple ingredients undergo a metamorphosis. Fermentation’s pretty wild. It brings out these flavors you never knew were there. I mean, the first time I tried homemade sauerkraut? Mind blown.
The Science and Craft of Fermentation
Fermentation’s kind of like cooking and mad science rolled into one. You play around with heat, time, and whatever’s in your fridge. Sometimes it works, sometimes… well, let’s just say I’ve had some interesting results. But when it clicks? Oh boy, it’s good. It is this interaction at the molecular level, a key aspect of culinary chemistry, that makes fermented foods so good. And it is just a matter of understanding how each ingredient behaves. Once you’ve got that down, you can tweak and adjust until the flavors are exactly how you like them—totally in your control. Knowing these factors can make or break your ferments. I’ve had my share of flops, but it gets easier with practice.
As a Culinary Experiment
Fermentation? Think of it as your own little food lab! You get to experiment with flavors, and the best part? You can totally eat your experiments! And they won’t even turn you into anything!! How cool is that?! You get to mix and match ingredients, try different methods. And the flavors? They can be really impressive. With the help of tiny microbes, everyday ingredients like cabbage turn into crunchy sauerkraut, and milk transforms into creamy yogurt. Seriously, those little microbes are like tiny chefs! Forget fancy ingredients—fermentation makes everyday food extraordinary! Think deeper flavors, better-for-you bites, and a happy gut. All thanks to a little science in your kitchen! Talk about the best of both worlds! You can totally tap into those traditional techniques while creating dishes that are bursting with totally new, exciting flavors.
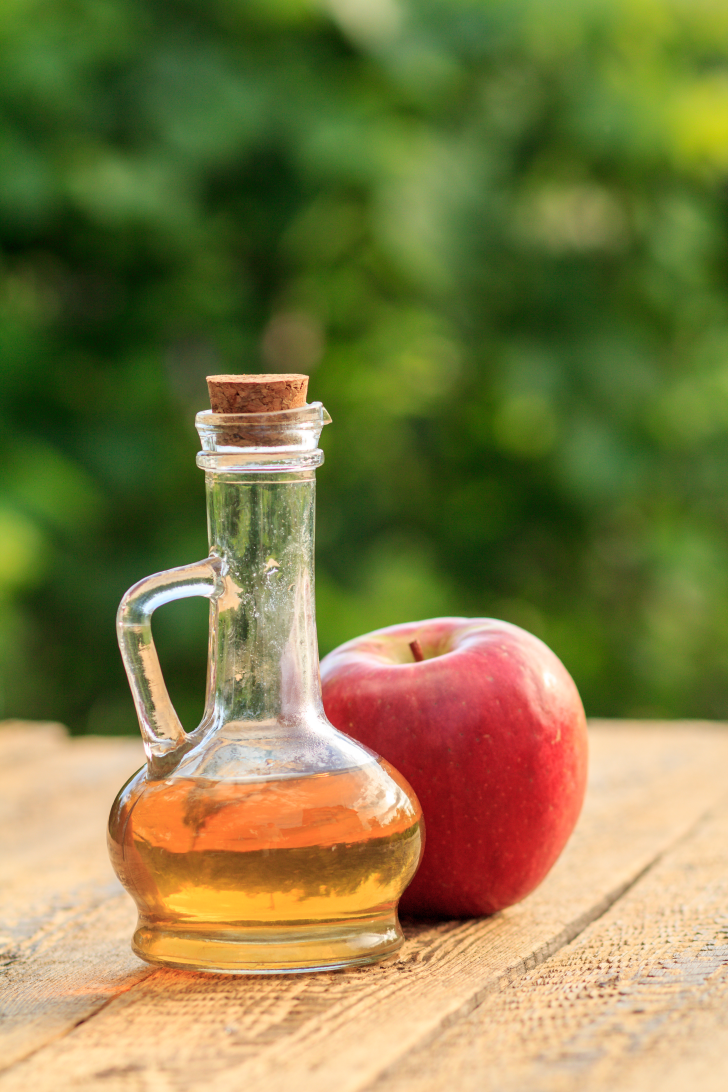
The Role of Acids in Cooking: Balancing Flavors
The Flavor-Boosting Power of Acids
Acids are the quiet powerhouses of the kitchen, doing way more than just adding a tangy pop. Think of acids like the quiet force (yes! A Starwars reference!!) in the background, subtly pulling everything together. You might not always notice them, but without them, the whole dish falls flat. A little lemon on fish or a dash of vinegar in sauce can change everything. Suddenly your dinner’s got way more flavors happening. It’s all about balance, thoughᅳyou want those flavors to blend, not battle. Acids step in to make sure everything in your dish plays nice, working behind the scenes to make every bite taste just right. I love America’s Test Kitchen for the vast depth of info on their site. This is one of the articles I always go back to: Acids in Food
The Role of Acids in Culinary Balance
Why do we use acids in cooking? Simple—they bring balance, turning sharp flavors into something smooth and making everything in your dish play nice together. Ever had a dish and thought it just needed a little extra? That’s where a dash of acidity often comes in. Acids can really wake up a dish. Like when you’ve got something really rich, acids come in and shake things up a bit.
Acids in Classic Dishes and Condiments
Think about the go-to classics—like a Caesar salad or ketchup on fries. What would a Caesar salad be without the tang of lemon juice in the dressing? Or imagine guacamole without that zip from lime. These dishes are classic examples of how acids bring balance, adding just the right touch of brightness to complement the other flavors.
How Acids Enhance Taste Perception
Acids completely change the way we taste food. They make salty stuff taste saltier, take the edge off bitter veggies, and somehow make desserts feel even more decadent. Go figure. That’s why even just a little vinegar in your soup or stew can wake up the whole meal. It fine-tunes the flavors, making everything in the dish pop just a bit more.
Diverse Sources of Acidity in Cooking
There are, however, a great many sources of acidity that you can experiment with in your cooking. You’ve got bright options like lemons, limes, and oranges, each bringing its own zesty flavor to the table. But don’t forget vinegars—white, apple cider, balsamic, or even specialty ones made of sherry or rice, because they can offer a whole other flavor note to your creations. Tomatoes bring only a light tanginess to perfectly complement sauces and stews, while dairy, such as sour cream and yogurt, yield the velvety tartness with which to brace a dish.
Tips for Using Acids Effectively in Cooking
So, what’s the secret to using acids in your cooking?Start small. Add acids gradually; it’s simpler to add than to correct a dish that’s become overly sour. Taste as you go, and think about what you want the acid to do. Are you looking to brighten up a rich sauce? A quick squeeze of lemon can wake up the flavors. Looking to deepen your salad dressing? A splash of apple cider vinegar brings just the right kick. A splash of apple cider vinegar might be perfect.
Getting Creative with Acids in the Kitchen
Playing around in the kitchen is the best part! How about soaking your meat in lime juice and spices before you grill it? It comes out super tender and packed with flavor. Or, try adding a bit of lemon to your brownies. It might sound strange, but it brings a surprising new layer to the flavor. You can really go wild with flavors if you want. I once added a splash of balsamic vinegar to my pasta sauce—sounds odd, but it actually worked – really well!!
Transforming Dishes with a Dash of Acidity
So, if the dish is just not coming out very nicely round or balanced, consider adding an acid: a squeeze of lemon, a splash of vinegar, even a bit of yogurt could just do the trick. Much of it involves balancing flavors, and acids do well with sharpening the taste and raising the taste balance of your meals. They really can transform a dish and give it that wow element. With some practice, you’ll quickly see how a touch of acid can make a world of difference.
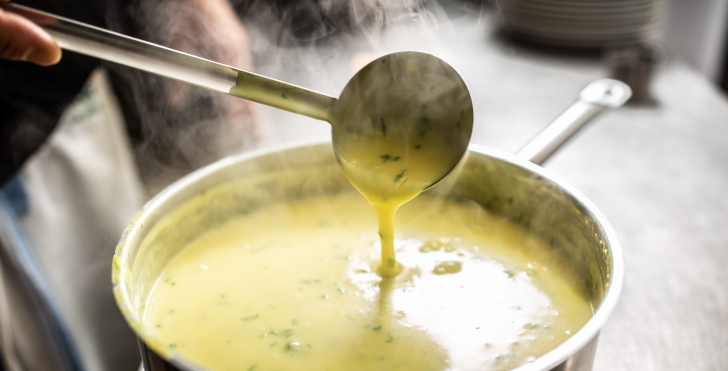
The Science of Sauce: Perfecting Thickness
Let’s break down how roux and slurry work their magic in the kitchen. Understanding what’s happening when you mix flour with fat or stir starch into water isn’t just for science nerds—it can take your sauces from good to amazing. Once heat does its work on these ingredients, you’ll notice richer flavors and smoother textures coming to life in your dishes.
The Science of Roux
Let’s break down how roux and slurry work their magic in the kitchen. Flour consists of starch granules, tiny pockets of glucose molecules bonded together. It’s kind of wild what happens when you heat starch with fat. The little starch bits drink up the liquid like tiny sponges, get all puffy, and then – pop! Suddenly your sauce is all thick and smooth. As the molecules hit the water, they stretch out and form a web that traps liquid, thickening your sauce to just the right consistency.
The fat you choose changes everythingᅳgo for butter if you want that rich, creamy taste, or pick oil for a smoother, lighter finish. Butter’s pretty cool in a roux. It’s the water and milk in it that makes everything work. And the texture? Silky smooth – hard to beat, really. In contrast, oils or animal fats might contribute a different flavor profile or a smoother texture. The cooking time and temperature are critical; too high, and the flour can burn, too low, and the starch granules won’t fully gelatinize, leading to a sauce with a raw flour taste.
Any excuse to send you guys over to Michelin is a good one!! Here is a great, quick read on Roux
The Chemistry Behind Slurry
Slurries operate on a similar principle but with a distinct process. Mixing starches like cornstarch or arrowroot with a cold liquid and adding them to hot sauce triggers a reaction. With a blast of heat, starch granules quickly soak up water and start to puff up.. This process, known as gelatinization, thickens the sauce as starches escape the granules and work their magic.
A slurry works well for fast thickening and a clear finish, perfect for glossy sauces. A slurry works fast and keeps your sauces looking flawless, especially when presentation is key.The choice of starch matters greatly. Cornstarch gives a thicker, sometimes gloopy effect. Arrowroot, however, remains clear and silky, affecting flavor less. This makes slurries perfect for enhancing sauce textures and clarity.
The Impact of Temperature and Time
Both roux and slurry thickeners are highly sensitive to temperature. Gentle cooking lets roux’s starch granules fully absorb the fat, preventing lumps. This keeps the thickening smooth and even, giving your sauce that perfect consistency all the way through. Overheating a slurry can break down the starch molecules too much. This leads to a sauce that becomes thinner upon cooling or over time.
Getting the timing right makes all the difference in how your dish turns out. Making a roux takes patience—slow browning builds up those rich, toasted flavors that bring your dish to life. Slurries demand precision, added at the right moment to the hot liquid. They need just enough time to thicken, avoiding breakdown from excessive heat.
Embracing Culinary Chemistry
Knowing how roux and slurry work isn’t just for kitchen nerds—it’s your ticket to creating smooth, restaurant-quality sauces at home. Once you understand how these ingredients play off each other, adjusting the texture and flavor of your dish becomes second nature. No more guessing—just confidence in making sauces that hit the mark every time. Once you’ve got it down, it’s really satisfying to see the results come together. You can take regular stuff from your fridge and make something that’ll surprise you. I know I’ve shocked myself a few times.
Looking at cooking through the science lens, making roux and slurry is more than just cooking. It’s kind of like a mix of playing around, waiting it out, and getting excited when things taste good together. You don’t have to be a fancy chef to get into the science-y side of cooking. It’s pretty interesting stuff, actually. Even if you just cook at home, like most of us!!!!
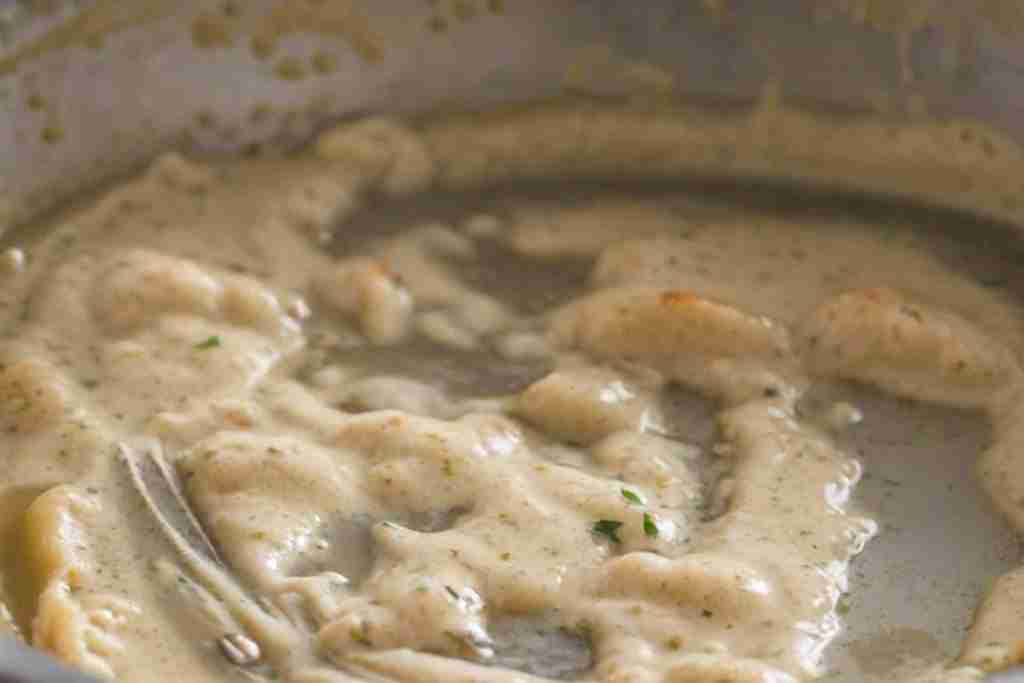
The Art of Thickening Sauces: A Closer Look at Roux and Slurry
Roux: The Foundation of Flavorful Sauces
A roux combines fat (often butter) and flour, cooked together.It’s the starting point for all kinds of sauces, soups, and gravies you know and love. Making a roux starts with melting the butter over medium heat. Then, add an equal part of flour to it. Keep stirring the mixture to cook the flour and avoid a raw taste. Do this until it reaches the perfect color and nuttiness. The color of a roux varies from white, giving a delicate flavor, to blond. You can take it to a deep brown for that bold, caramelized flavor that adds extra richness. The darker the roux gets, the more flavor it brings to your dish, though it thickens a bit less.
Roux is the base of some of the classic French mother sauces, like velouté and béchamel, It’s the base for famous sauces like béchamel and velouté. Besides thickening, roux gives dishes a smooth texture and deep flavor. But to nail it, you’ve got to keep a close eye and give it time—it’s all about the right timing and texture. Just go slow, letting the flour blend with the fat. This stops lumps from forming and makes sure your sauce is nice and smooth.
See if you can spot where we make a roux in our Savory Mac and Cheese! Hint: Step 7 🙂
Slurry: Quick and Versatile Thickening
Slurries are the go-to for quick, no-fuss thickening—ideal when you need results fast without compromising texture.IYou mix a starch, like cornstarch or arrowroot, with something cold like water or broth. Then, gradually whisk this mixture into the hot liquid you’re thickening. You add a slurry towards the end of cooking, unlike roux, which you cook before mixing it into the main dish. The beauty of a slurry is how fast it can turn a thin sauce thick, saving the day when time’s not on your side.
Slurries are very flexible, they will fit right in with anything from Asian stir-fries to gravies and soups. Using a slurry is great because it’s clear and flavorless. It thickens your dishes just right without messing with their taste or appearance. Remember, sauces thickened with a slurry can thin out if overcooked or reheated. So, timing is absolutely crucial.
Choosing Between Roux and Slurry
The choice between a roux and a slurry really comes down to the final look and feel you want for your sauce. If you want a rich, hearty flavor with a nice smooth feel, go for a roux. It’s ideal for classic sauces and traditional dishes where rich, layered flavors really can take center stage. If you’re in a pinch or working with delicate flavors, a slurry is your go-toᅳit thickens fast without messing up the sauce’s texture or look.
One of my favorite resources on line is The Tasting Table. Here is their take on Roux and Slurry’s
Tips for Perfect Sauces Every Time
Patience with Roux: Allow your roux to cook thoroughly to avoid a floury taste in your sauce. Let it go a bit longer for deeper flavors but just be careful and don’t burn it!
Mix Slurries Well: Make sure the starch is fully dissolved in cold liquid first to avoid any lumps.
Add Gradually: Whether you’re using a roux or a slurry, add it slowly to your sauce, stirring constantly to keep everything smooth and lump-free.
Mind the Heat: Avoid boiling sauces thickened with a slurry, as high heat can break them down and cause them to lose their thickening power.
Experiment: Experiment with different fats in your roux or starches in your slurryᅳyou’ll be surprised how the right combo can nail your sauces!
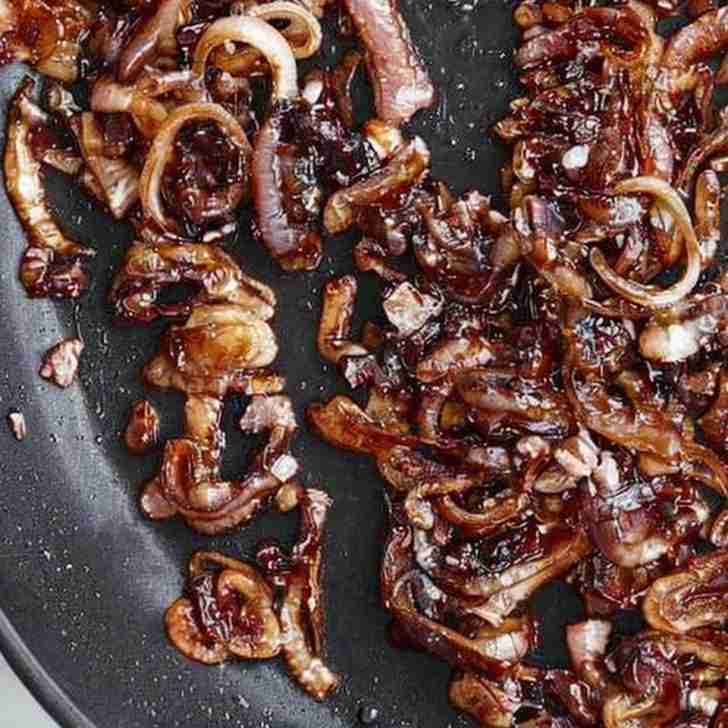
Caramelization: Sweet Science in Action
The Magic of Caramelization
Caramelization turns simple ingredients into deeper, richer flavors and… it adds a beautiful golden color to match! It’s the reason roasted vegetables, seared meats, and baked goods develop those irresistible deep flavors and golden-brown hues. This process breaks down sugars, and what you will find is layers of sweetness and depth you didn’t know were hiding in your food. Whether you’re browning onions or searing steak, understanding caramelization reveals hidden layers of flavor and color. So if you ever wondered why some dishes taste so much better than others, there’s actually some cool science behind it. And you can try it out right now!! Caramelized Shallots
Simplicity Behind the Transformation
Caramelization is just sugar getting brown, plain and simple! When you gently heat sugar, it starts to change, making all sorts of new flavors. These compounds are what give caramelized foods their deep flavors and that oh-so-perfect golden color. Caramelization brings us everything from golden toffee to deep, dark sauces. But it’s not only about melting sugar, it will bring out the natural sweetness in fruits and vegetables like onions and carrots.
The Science of Flavor and Color
When you gently heat sugar, it starts to change, making all sorts of new flavors. It’s about sugar getting so hot it changes, breaking down into sweeter, simpler bits we know as fructose and glucose. As water evaporates, this process creates hundreds of flavorful compounds (flavor bombs? Did I say that? Yes, yes I did) that bring out richer, more complex tastes. These elements give caramelized dishes their rich color and layered flavors, from nutty and buttery to sweet and a bit bitter.
Unlocking Flavor Possibilities in Your Kitchen
Why does this matter in your kitchen you ask? Well for starters, understanding caramelization opens up an entire world of flavor possibilities. Caramelizing onions does more than make them soft. Caramelization pulls out their sweetness, creating a tasty base for soups, stews, and sauces. The same goes for roasting root vegetables or browning meat. Caramelization deepens the flavors in every step, and what’s left behind is a sweet, deeply satisfying flavor.
The Delicate Art of Perfect Caramelization
But caramelization is about patience and controlling temperatures – you can not rush this, no way! It’s really is a fine line between beautifully caramelized and totally burnt! When you mix in ingredients like cream or butter, you’re doing more than halting caramelization – You’re bringing in new flavors and textures.
Caramelization vs. Maillard Reaction
When you cook meat or toast bread and it gets that nice brown color and tasty flavor, that’s often the Maillard reaction teaming up with caramelization. But they’re not the same. The Maillard reaction is about amino acids and sugars reacting at cooler temperatures, while caramelization is just sugar getting hot and changing. But in the kitchen, they both play their part to make our food more delicious. So like I say to my two boys – I love them the same!
Mastering the Science of Caramelization
Achieving perfect caramelization requires understanding its some of science behind it – don’t worry, not too much. Factors like the type of sugar, temperature, and cooking time all play crucial roles. For example, different sugars caramelize at different rates due to their molecular structure. Fructose caramelizes at lower temperatures compared to glucose and sucrose and that is going to change how we approach the process.
Caramelization in Cooking Practice
Playing around with caramelization in your own kitchen is pretty cool. It’s like a little science experiment, but one you can eat! Browning sugar for crème brûlée, roasting vegetables, or searing meat for flavor are all parts of an ancient science experiment. Each technique uses heat to transform yet gives you such different results! You are not alone in loving this process, this experiment has been fascinating cooks for centuries. It’s the simple, timeless wonder of transforming food through heat.
Applying Caramelization Techniques at Home
So, how can you play with caramelization in your cooking at home? Start simple. Try caramelizing onions to add a rich base to your next dish. Or experiment with roasting vegetables to bring out their natural sweetness. For those with a sweet tooth, making homemade caramel sauce (Me!!! I want to do that!!) might be the perfect introduction to the wonders of sugar transformation. Remember, it’s all about the heat, the timing, and most importantly, the sugar.
And thats a rap!
We’ve tackled why chopping onions can make us cry, discovered the secret behind the delicious crust on seared meat, and learned that mixing oil and vinegar isn’t just about stirring. Cooking is all about having fun and experimenting – well and then eating your crazy experiment right?! A little science know-how can turn any dish into something amazing – well not ANY dish. Fish heads, no, no nothing will help that!
We explored how fermentation and just a small amount of acid can create exciting new flavors. We looked at mastering simple techniques like thickening with roux and slurries can make such a big difference in your kitchen. It’s like the kitchen becomes a playground, where every recipe is a chance to experiment, learn, and have fun creating food that’s just as exciting to cook as it is to eat.
As we close out this guide, remember, every trip to the kitchen is a chance try something new. You just need to be willing to experiment and most of all have fun!!
