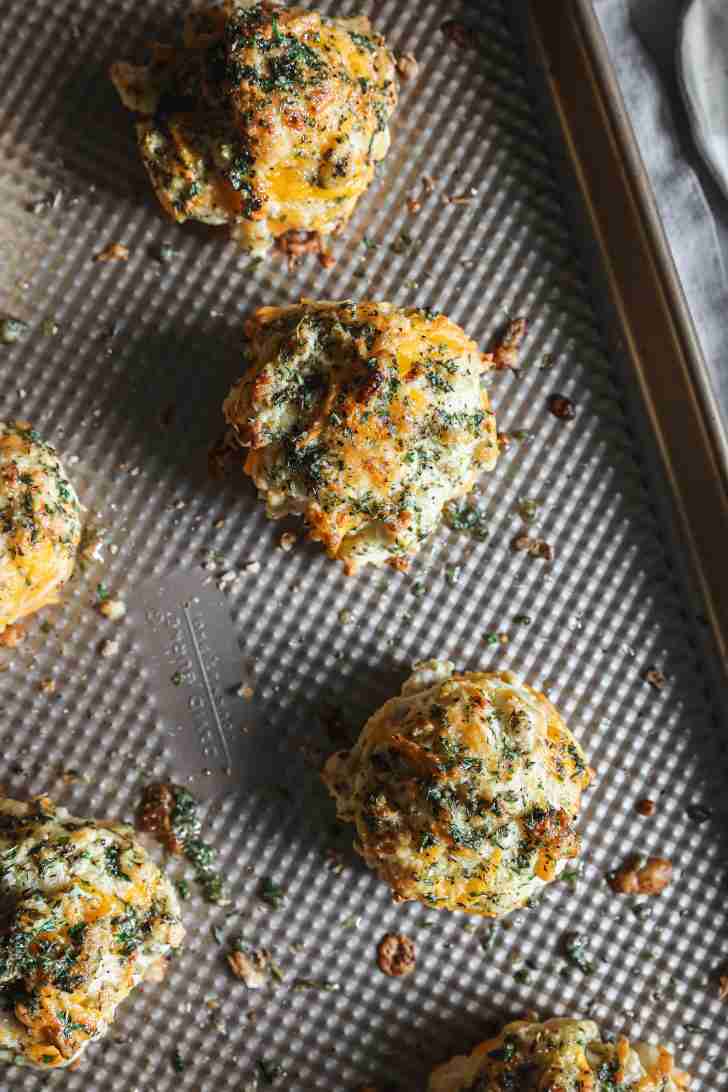
The Best Cheddar Cheese Biscuits

A handful of ingredients, twenty minutes, and you’ve got cheddar cheese biscuits that are warm, flaky, and absolutely loaded with melty sharp cheddar. The garlic herb butter goes on while they’re still hot out of the oven and soaks right in. If you’ve ever had Red Lobster’s Cheddar Bay Biscuits, you already know the idea. These are the homemade version and they are BETTER! You will make them once and then you will make them every week. I’m not exaggerating.
Do not forget to check out my Chefs Tips sections below!
The Recipe is next!
But remember, you can scroll past the recipe to learn a bunch more about my Best Cheddar Cheese Biscuits. The recipe is listed again at the end – so you don’t have to come all the way back up here!! Unless you want to 🙂

The Best Cheddar Cheese Biscuits Recipe
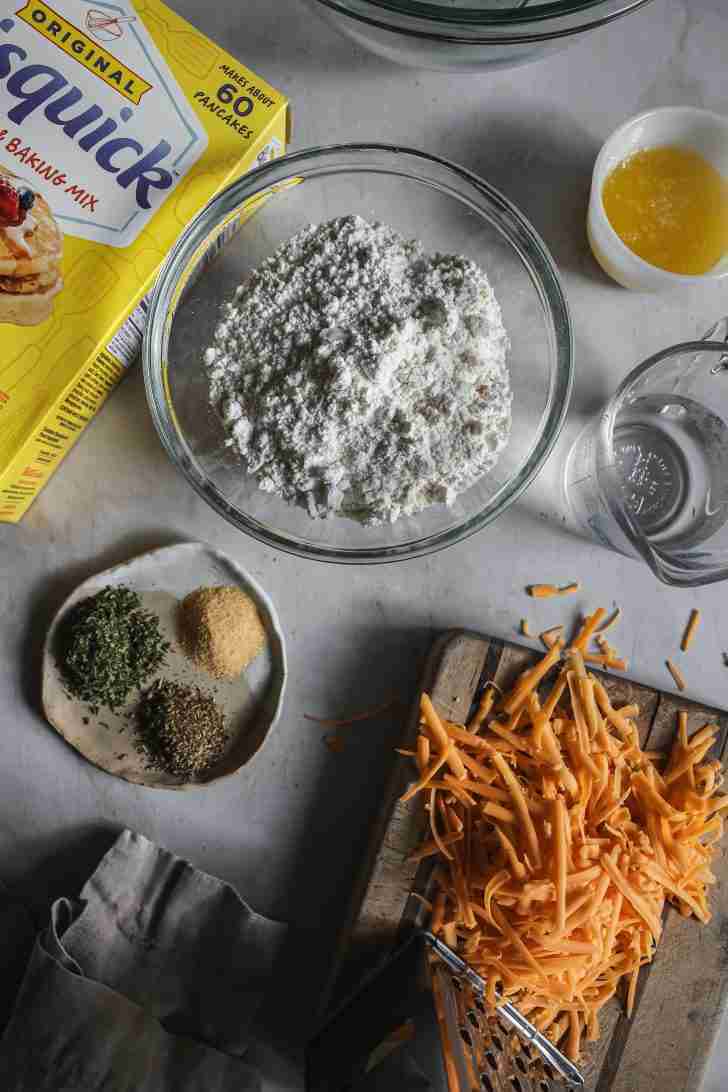
Ingredients
- 2 cup Bisquick mix
- 1/2 cup cold water
- 3/4 cup sharp cheddar cheese, grated
- 1/4 cup butter, melted
- 1 tsp garlic powder
- 1 tbsp parsley flakes
- 1 tsp Italian seasoning
Instructions
- Set your oven to 450°F (220°C).
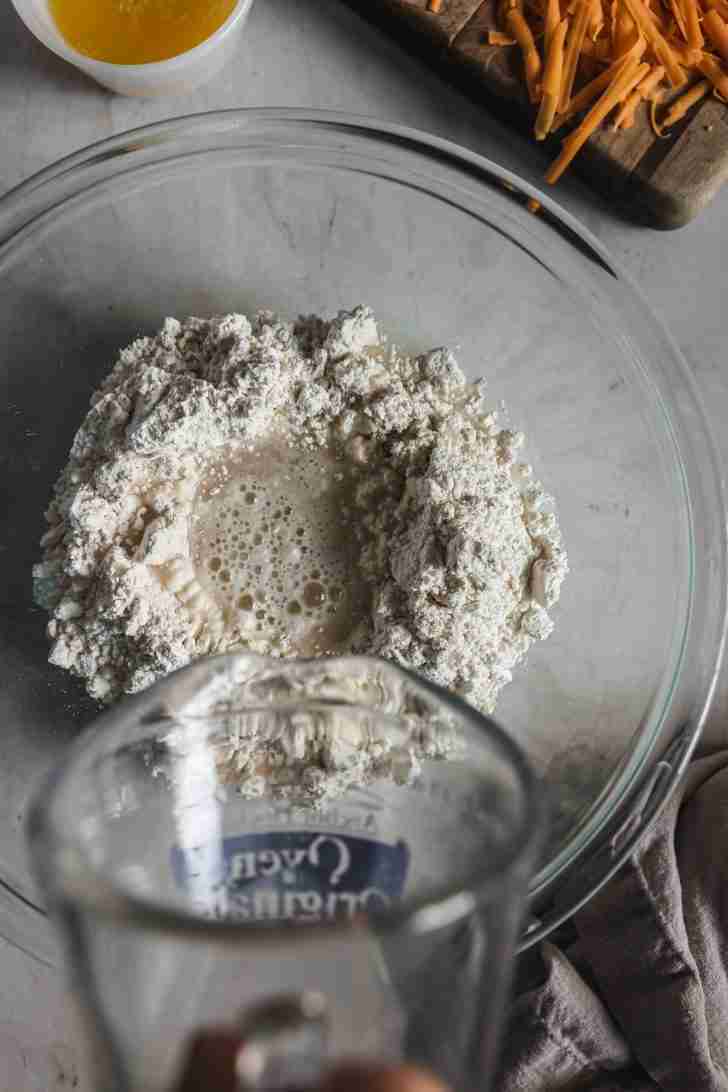
- In a large bowl, combine 2 cups of Bisquick mix with 1/2 cup of cold water. Stir just until the dough comes together.
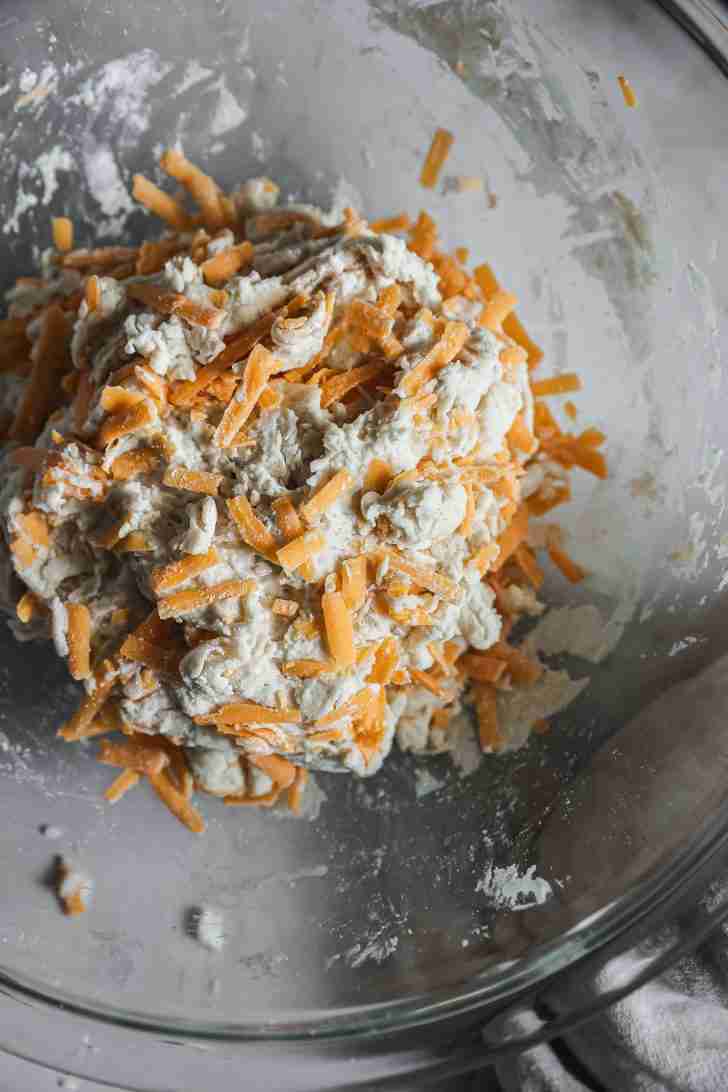
- Gently fold in 3/4 cup of grated sharp cheddar cheese.
- Drop spoonfuls of the dough onto a greased baking sheet.
- Place the baking sheet in the oven and bake the biscuits for 8-10 minutes, or until they turn golden brown.
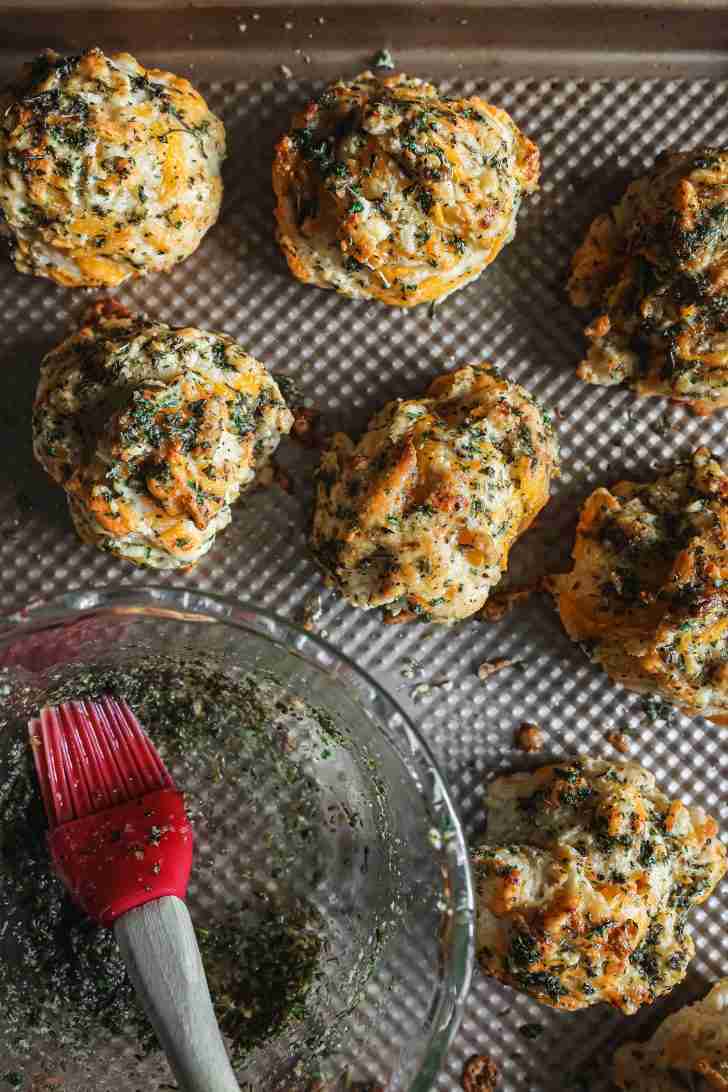
- While the biscuits are baking, melt 1/4 cup of butter and stir in 1/2 tsp of garlic powder, 1/2 Tbsp of parsley flakes, and 1/2 tsp of Italian seasoning.
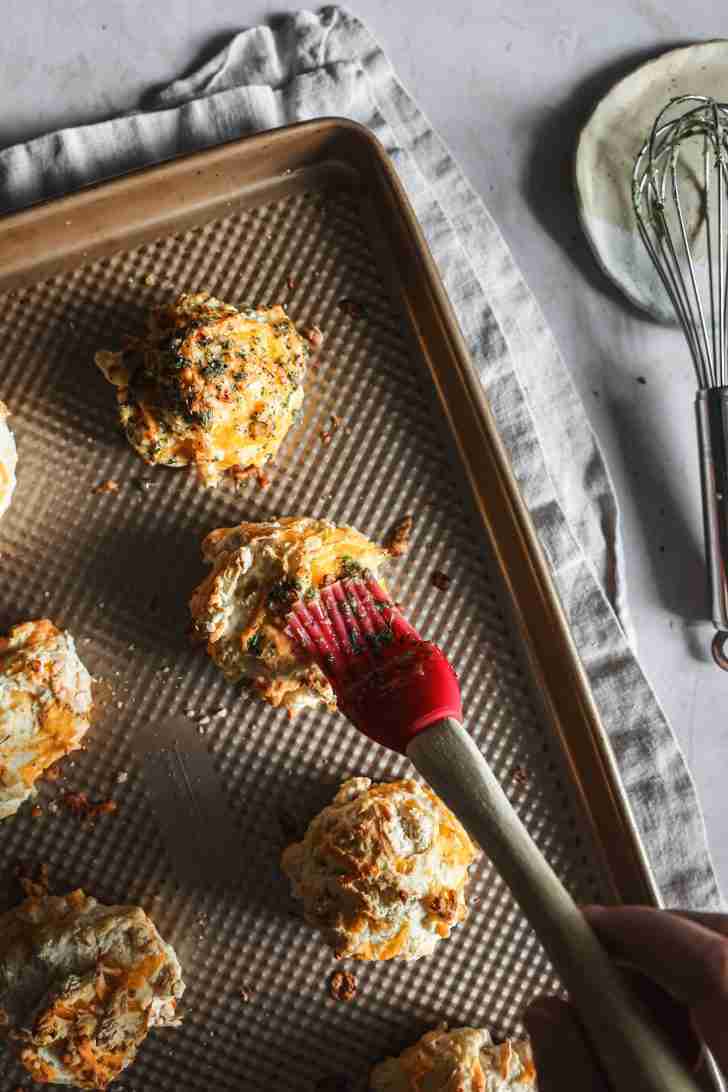
- Once the biscuits are done (hot), brush them with the seasoned butter mixture.
- Enjoy the biscuits warm.
Lots of good stuff below
Don’t slide that tray into the oven just yet… there’s a TON more here to help you nail these cheddar cheese biscuits every single time. Wondering how to get them flaky without overmixing, or why the garlic butter needs to go on while they’re still hot? Read on for chef’s tips, a full Flavor Adjustment Guide, FAQs, and more. The full recipe is waiting again at the end!
Cheddar Cheese Biscuits — A Little History
You can’t talk about American cooking without mentioning biscuits. They’ve been a mainstay since the 1800s and in the South you’d find them on the table at every meal. The old time ones were nothing fancy… just flour, fat and some liquid. The idea was to get something flaky and tender on the table in a hurry, no yeast and no time wasted waiting for dough to rise. That’s what set them apart from bread and why home cooks who didn’t have all day to spare loved them
It wasn’t until later that cheese made its way into the mix. When you put sharp cheddar in the dough it is a whole new animal! The cheese melts while it bakes and puts pockets of flavor in there rather than just having butter on top of plain bread. It turns a simple side dish into something worth getting worked up over!!
Then along came Red Lobster. Their Cheddar Bay Biscuits put one of the most well-known restaurant sides on the map in this country, and everyone was keen to try making them at home. You see a lot of Bisquick copycats for good reason… they’re quick and easy and as good if not better than the restaurant version, seeing as yours are fresh from the oven and not sitting under a heat lamp! We’ve put our own spin on it with this recipe and a garlic herb butter to finish it off that has the whole house smelling incredible.
What Makes This Cheddar Cheese Biscuits Recipe Different
Sure, Bisquick makes for an easy base, but the top work is what sets this recipe apart from the rest. You will find most copycats are content to just mix and bake the dough and call it a day. We put in a little more effort with a garlic herb butter. While the biscuits are hot enough to take it in, we brush on a blend of melted butter with garlic powder, parsley and Italian seasoning. It is the perfect finish!
As for the cheese, you want it in the dough, not sitting on top. Take some sharp cheddar, grate it yourself (pre-shredded has anti-caking agents that don’t melt right) and fold it in by hand. As they bake you get nice cheesy pockets throughout. The difference is plain to see if you do it properly.
We also make a point not to overmix, which is the common mistake with biscuits. A bit of stirring to bring the dough together is all you need; let the lumps and unevenness be. In fact, if the dough looks like it isn’t quite ready, then it is. Those imperfections are what yield flaky layers rather than something dense and hard. And use cold water, not milk. The water keeps the fat in the Bisquick solid for longer so when it goes in the hot oven you have a superior texture. Milk is fine, but the water is better.
Why This Cheddar Cheese Biscuits Recipe Works
- Bisquick Does the work: Flour, shortening, salt, and baking powder already mixed and ready to go. No measuring five different dry ingredients. Just add water and cheese and you’re there.
- Cold Water Matters: It keeps the fat in the Bisquick from melting too early That’s how you get flaky layers instead of a dense puck. Don’t use warm water or you lose the texture completely.
- Sharp Cheddar Melts Into the Dough: As the biscuits bake, the cheese melts right into them. Sharp cheddar gives you that savory flavor that mild cheddar just can’t. Grate it yourself for a smoother melt.
- The Garlic Butter Goes On Hot: Brushing seasoned butter on while the biscuits are still screaming hot means it soaks in instead of sitting on top. Garlic powder, parsley, Italian seasoning. That’s the finishing touch that makes people reach for a second one before they’ve finished the first.
- 450°F Is Not a Typo: High heat gives you a crispy golden outside and a soft, fluffy inside. Lower temps and you get pale, doughy biscuits that nobody gets excited about.
How to Make These Cheddar Cheese Biscuits
Step 1: Prepare the Dough
- Mix Bisquick and cold water in a bowl until the dough just comes together.
- Gently fold in the grated sharp cheddar cheese.

Step 2: Bake the Biscuits
- Drop spoonfuls of the dough onto a greased baking sheet.
- Bake at 450°F (220°C) for 8-10 minutes until golden brown.
Step 3: Season and Serve
- While baking, melt the butter and mix with garlic powder, parsley flakes, and Italian seasoning.
- Brush the hot biscuits with the seasoned butter. Enjoy warm!
Make-Ahead & Storage
- Prep Ahead: You can grate the cheese and mix the garlic herb butter the night before. Keep them separate in the fridge. Don’t mix the dough until you’re ready to bake though. These are at their best straight out of the oven and the dough doesn’t sit well.
- Refrigerate: Leftover biscuits keep for 2 to 3 days in a sealed container or wrapped in foil. They won’t be as good as fresh but they’re still pretty great reheated.
- Freeze: Bake them, let them cool completely, then freeze in a sealed bag. Good for up to 2 months. Pop them in a 350°F oven for 5 to 8 minutes straight from frozen and they come back to life surprisingly well.
- Reheat: Oven at 350°F for 5 minutes. Don’t microwave them or they turn rubbery and sad. If you want to go the extra mile, brush on a little more garlic butter after reheating.
- Meal Prep Tip: Make a double batch and freeze half. On a busy weeknight, pull a few from the freezer and reheat while dinner cooks. Fresh-tasting biscuits with zero effort.
Chef’s Tips for These Cheddar Cheese Biscuits
- Use cold water: Not room temperature, not warm. Cold. It keeps the fat in the Bisquick from melting before the biscuits hit the oven, and that’s what gives you flaky layers.
- Don’t overmix the dough: Stir until it barely comes together and stop. Lumpy is good. Overmixed dough makes tough, dense biscuits and there’s no fixing it once you’ve gone too far.
- Grate your own cheese: Pre-shredded has anti-caking agents that keep it from melting smoothly. Fresh grated sharp cheddar melts better and tastes better. It takes two minutes.
- Watch them closely at 450°F: They go from golden to burnt fast at that temperature. Start checking at 8 minutes. You want golden on top, not brown.
- Brush the butter on immediately: The second they come out of the oven, brush the garlic herb butter on while they’re screaming hot. It soaks in instead of just sitting on top. Wait too long and you lose that.
Flavor Adjustment Guide for These Cheddar Cheese Biscuits
Biscuits are simple but things can still go sideways. Here’s how to fix it.
- Biscuits Too Dense? You overmixed the dough. Next time stir until it just comes together and walk away. The lumps are your friend.
- Biscuits Too Dry? They were in the oven too long. At 450°F you’ve got a narrow window. Pull them at golden, not brown. If it’s already happened, extra garlic butter on top helps.
- Not Cheesy Enough? Add more cheddar next time. You can go up to a full cup without changing the texture. Make sure you’re using sharp, not mild. Mild cheddar barely tastes like anything once it’s baked in.
- Cheese Didn’t Melt Smoothly? You probably used pre-shredded. The coating on it prevents a clean melt. Grate your own from a block next time.
- Garlic Butter Didn’t Soak In? You waited too long after they came out of the oven. It needs to go on while they’re still hot enough to absorb it. If they’ve cooled down, pop them back in the oven for a minute and then brush.
- Too Salty? The Bisquick, cheese, and garlic butter all bring sodium. Ease back on any added salt and taste the dough before baking. You might not need any extra at all.
- Bottom Burnt but Top Not Done? Move the baking sheet to a higher rack. Or your oven runs hot. An oven thermometer is worth the ten dollars.
- Biscuits Spread Too Flat? The dough was too wet or too warm. Make sure you’re using cold water and don’t overwork it. Drop them in tall mounds, not flat scoops.
Key Ingredients in These Cheddar Cheese Biscuits
- Bisquick: The shortcut that makes these possible in twenty minutes. Flour, shortening, salt, and baking powder already mixed. No measuring four separate dry ingredients.
- Sharp Cheddar Cheese: Grated fresh, not from a bag. Sharp gives you that snappy, savory punch that mild cheddar can’t. It melts into the dough as it bakes and creates cheesy pockets throughout.
- Cold Water: Keeps the fat solid until the biscuits hit the oven. That’s how you get flaky. Warm water melts the shortening too early and you end up with something dense.
- Butter: Melted and mixed with the seasonings for the garlic herb topping. It goes on hot and soaks right in.
- Garlic Powder: The backbone of the butter topping. Mixes evenly into the melted butter where fresh garlic would burn or clump.
- Parsley and Italian Seasoning: Color and herby flavor in the butter. The parsley is mostly visual but the Italian seasoning adds a warmth that ties it all together with the garlic.
Faq’s
You can, but I recommend grating your own cheddar. As we said in the Chefs Tips section, pre-shredded cheese has a coating that can keep it from melting as smoothly. Freshly grated cheese melts better and adds more flavor!
Yes! You can mix the dough for these classic cheese biscuits ahead and refrigerate it for a few hours. Just bring it to room temp before baking so the biscuits rise properly.
No worries! You can make your own with flour, baking powder, salt, and butter. It’s super easy and works just like the store-bought mix.
Definitely! Bake them, let them cool, then freeze. Just pop them in the oven when you’re ready, and they’ll taste just as fresh and delicious!
Check them around 8 minutesᅳyou’re looking for a nice golden color on top. They should feel firm but not too hard. Don’t leave them in to long (over bake), or they’ll dry out!
Sharp cheddar. It has enough flavor to come through after baking and it melts cleanly into the dough. Mild cheddar disappears. Extra sharp can be crumbly. Sharp is the sweet spot.
Yes. Mix 2 cups flour, 1 tablespoon baking powder, 1 teaspoon salt, and cut in 1/3 cup cold butter until it looks like coarse crumbs. Use that in place of the Bisquick and follow the rest of the recipe as written.
Cold water, don’t overmix, and drop the dough in tall mounds not flat scoops. The oven needs to be fully preheated to 450°F before the tray goes in. If the oven isn’t hot enough the butter melts before the biscuits have a chance to set.
Same idea. The Bisquick base with sharp cheddar and garlic butter is the Red Lobster formula. Ours adds Italian seasoning and parsley to the butter and we use cold water instead of milk. Close enough that you’ll recognize it, different enough that you’ll prefer it.
Equipment Needed for These Cheddar Cheese Biscuits
- Mixing Bowl: You’ll want a large bowl for mixing the doughᅳsomething simple, just enough to keep things neat and easy..
- Cheese Grater: If you’re using fresh cheddar (which I recommend! ), use a grater to get that perfect cheese texture.
- Baking Sheet: A basic baking sheet is all you need to drop your dough onto for baking. You will for sure need to grease the pan or line it with parchment paper (my favorite) to save yourself some cleanup time!
- Spoon or Cookie Scoop: This helps you drop evenly sized biscuits onto the baking sheet. A cookie scoop works great for this!
- Pastry Brush: You’ll want one of these to brush that delicious garlic butter all over the biscuits right after they come out of the oven.
- Measuring Cups and Spoons: Gotta make sure you’re getting those amounts just right, especially for the Bisquick and seasonings.
- Parchment Paper or Non-Stick Spray: Either one works to keep your biscuits from sticking to the baking sheet, plus it makes cleanup super easy!
- Wire Rack (optional): If you want to keep your biscuits extra crispy, let them cool on a wire rack after baking. It’s optional, but definitely helpful.
Related Recipes You’ll Love:
Insane Cheese Biscuits — The upgraded version of these. If you loved the classic, this one takes it further with more cheese, more flavor, more everything.
Worlds Best Chili — Warm biscuits and a bowl of chili. That’s a meal that needs no explanation.
Deep End Chicken Noodle Soup — Another dish that practically begs for a warm biscuit on the side. Dunk away.
Creamy Deviled Eggs Recipe — If you’re putting together a spread, these two side by side will disappear fast.
Buffalo Chicken Dip Obsession — Tear a warm biscuit in half and scoop this dip with it. You’re welcome.
You made it!
OK! Now that you made it all the way down here, you can just go right back up to the recipe!!